
How to change Hostname / Computer's name on Windows Cloud Servers

A hostname is used to identify a server and this is the unique name. The requirements for enabling computers to communicate with each other on a network using the concept of the hostname.


This article will guide you on how to change the hostname on the Windows server.


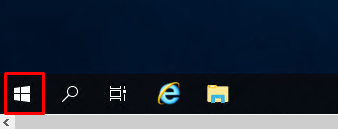
  1. Click on the Windows icon.

    hostnamewindows1

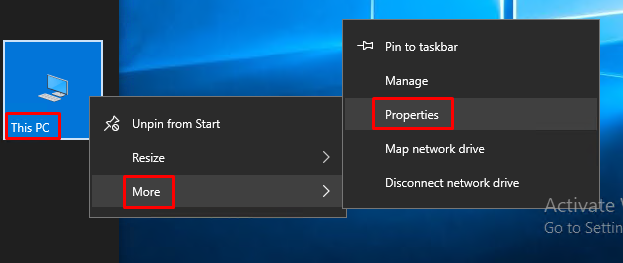
  2. From the new Window right-click This PC icon and then select More & Properties.

    hostnamewindows2

  3. From the new window, click Change settings.
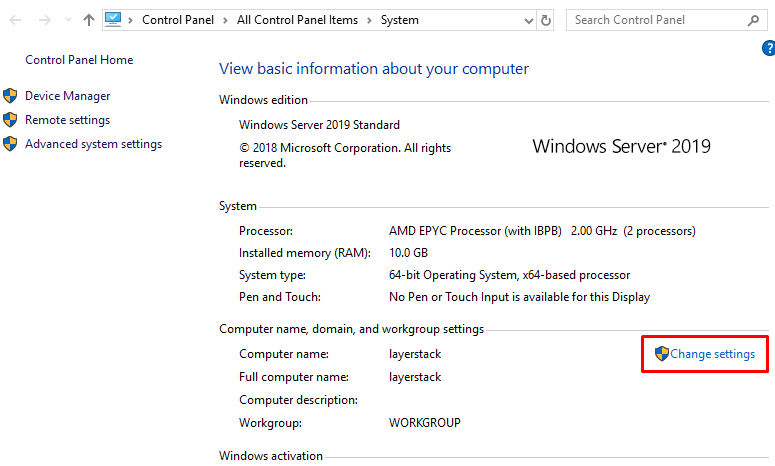
    hostnamewindows3

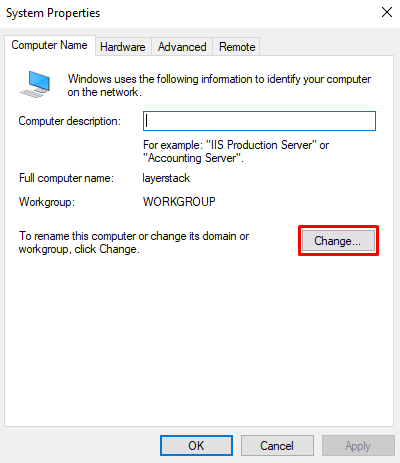
  4. This will open System Properties in a new window and Click Change.

    hostnamewindows4

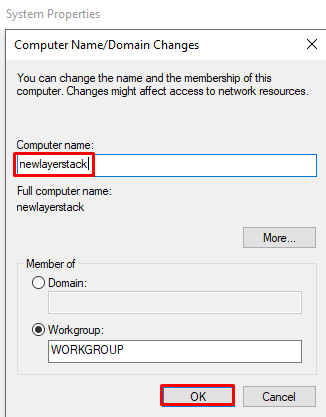
  5. Input the new hostname in the Computer name field and then click OK.

    hostnamewindows5

  6. A new dialog box will appear with a message that the server will need to be restarted for the changes to take effect and then click OK.
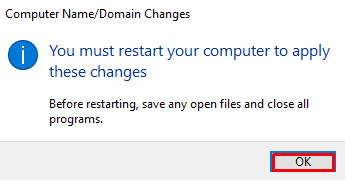
    hostnamewindows6

  7. If you are ready to restart your server, select Restart Now.
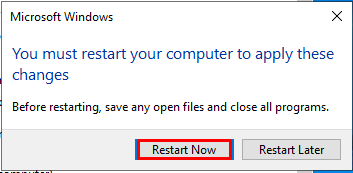
    hostnamewindows7

  8. After the restart, your Windows hostname will be updated into a new one.
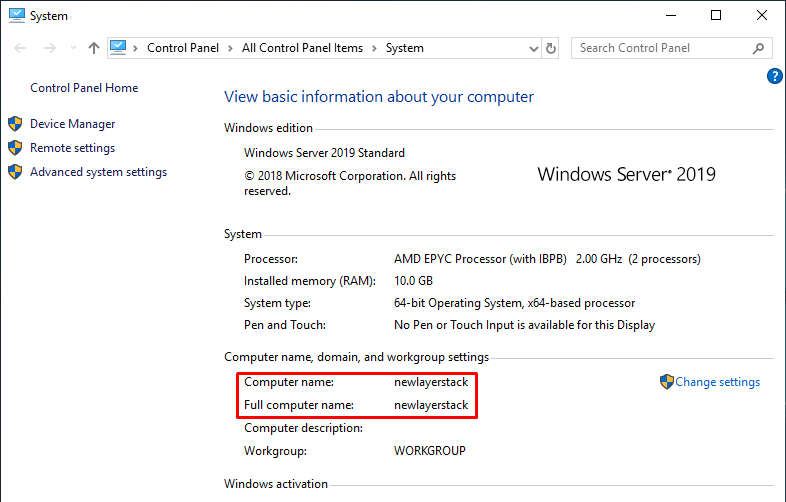
    hostnamewindows8

Was this answer helpful? 0 Users Found This Useful

Related Articles

How to Resolve the “Exceeded Connection Limit” Issue on a Port 3389 Terminal Server

Some customers may encounter the message “The terminal server has exceeded the maximum number of...

Windows Server Remote Desktop Connection Tutorial

Detailed Guide to Windows Remote Desktop Connection Remote Desktop Protocol (RDP) is a built-in...

Windows Firewall

Open Windows Firewall with Advanced Security Go to Inbound Rules → New Rule Select...

How much hard disk and memory configuration does a Windows virtual machine require?

Many users often have doubts about configuration choices when purchasing or deploying Windows...