

How to Backup Your VPS: A Simple Guide to Getting Started
Prerequisites
Before you begin, ensure you have the following:
1. Your primary VPS (the one you wish to backup)
2. Your backup VPS. The backup VPS should be equal to, or ideally larger in storage size than your primary VPS.
3. Both servers accessible via SSH.
4. Important: Ensure rsync is installed on both servers. If it’s not already installed, you can install it using these commands:
– For CentOS, AlmaLinux, or Rocky Linux:
sudo yum install rsync -y– For Ubuntu or Debian:
sudo apt-get update && sudo apt-get install rsync -yDon’t have a backup server? We recommend ordering another VPS with RackNerd in a different datacenter location than your primary VPS. Here’s a special deal for a 100 GB storage VPS you can get from RackNerd for just $35/Year (you can select your desired server location within the ordering form): https://my.racknerd.com/cart.php?a=add&pid=874
Logging into Your VPSs
Before we start the setup process, you need to log into both your primary and backup VPSs:
1. Open two separate terminal windows or SSH clients on your local computer.
2. In the first window, log into your primary VPS:
ssh root@primary-vps-ipReplace `primary-vps-ip` with your primary VPS’s IP address.
3. In the second window, log into your backup VPS:
ssh root@backup-vps-ipReplace `backup-vps-ip` with your backup VPS’s IP address.
Keep both of these SSH sessions open. We’ll refer to them as the “primary VPS window” and the “backup VPS window” in the following instructions.
Setting Up SSH Key Authentication
Now, we’ll set up SSH key authentication to allow your primary VPS to connect to your backup VPS without a password. This step is critical for our next step we will go over, which is how to automate daily backups of your VPS.
1. In your primary VPS window, generate an SSH key pair (if you don’t already have one):
ssh-keygen -t rsa -b 4096Press Enter for all prompts to use default options and no passphrase.
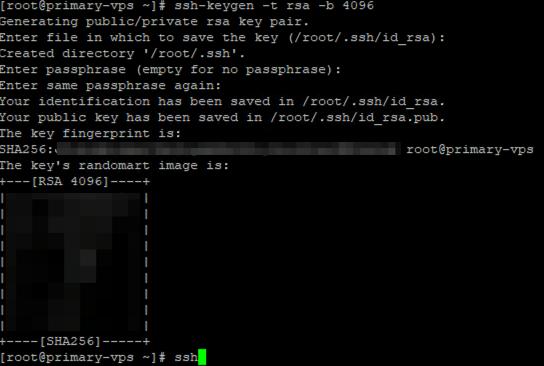
2. Still in your primary VPS window, copy the public key to your backup VPS:
ssh-copy-id root@backup-vps-ipReplace `backup-vps-ip` with your backup VPS’s IP address. You’ll be prompted to enter the root password for the backup VPS.
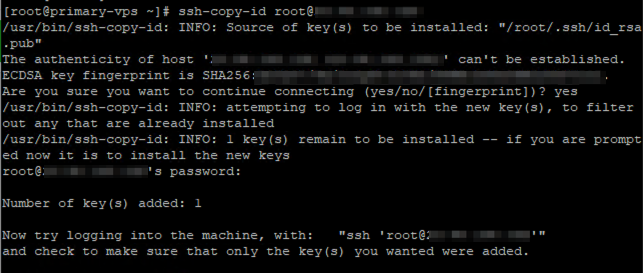
Setting Up and Automating the Backup
Now we’ll set up the backup process:
1. In your backup VPS window, create the backup directory:
mkdir -p /home/backup
2. Copy the following command to a notepad on your local computer:
(crontab -l 2>/dev/null; echo "0 2 * * * rsync -avz --delete --exclude={'/dev/*','/proc/*','/sys/*','/tmp/*','/run/*','/mnt/*','/media/*','/lost+found'} -e ssh / root@backup-vps-ip:/home/backup") | crontab -3. In your notepad, replace `backup-vps-ip` with your backup VPS’s IP address.

4. After editing, copy the command from your notepad to your clipboard by selecting all and doing CTL + C, and then paste it into your primary VPS window.
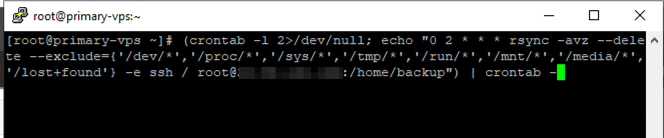
Press Enter to run it.
5. To verify that the cron job has been added, run this command in your primary VPS window:
crontab -lYou should see the backup command listed:
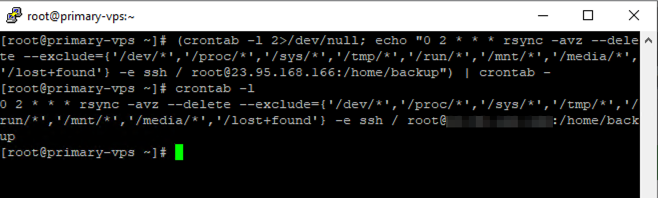
That’s it! Your primary VPS will now be backed up automatically every day at 2 AM to the `/home/backup` directory on your backup VPS.
Important Caveats
While this method provides a quick and simple way to set up backups, it’s important to understand its limitations. This script doesn’t include conditional checks, such as verifying if the destination server is accessible or checking available disk space on the backup server. You won’t receive notifications if the backup server runs out of space. Additionally, the script has limited error handling capabilities and does not preserve file states, meaning that if you accidentally delete a file on the main server, rsync will also delete it from the backup server during the next cron job run, potentially limiting your ability to recover from accidental deletions unless caught before the daily 2 AM backup.
For a robust backup solution, you should consider developing additional checks and features, either manually or automatically, based on your specific needs, or using a more sophisticated backup software such as the ones mentioned in the “Other Backup Solutions” section of this post.