
How to Setup WordPress Multisite
Before we dive into the technical details, let’s start by understanding what WordPress Multisite is.
A WordPress Multisite (or Multisite network as WordPress calls it) enables you to run and manage multiple WordPress sites/blogs from a single WordPress instance. New sites can be instantly deployed and managed using the same username and password. It also has the provision to allow other users to sign up and create their own blogs/sites on your domain.
This allows you to manage multiple sites from a single dashboard or each site can have its own admins who have the privileges to manage only their own website. You can install and activate plugins/themes for multiple sites with a single download. This also makes the update management a breeze as you only have to do it once for all the sites.
But be advised that all sites/blogs on the multisite setup share the same resources so if one of your site/blogs gets huge unexpected traffic, it will affect all other sites on the network. The same is true if any of your sites get compromised, your entire network will be compromised. You would also have to verify the compatibility of plugins/themes before using as some of them might not work in a multisite setup. Also, it will be little difficult to manage server resources and traffic for those who are new to this.
If you have validated all these above-mentioned points and found that WordPress Multisite will benefit you, then let’s start building it.
If you already have a WordPress instance which you would like to convert to a multisite, please make sure to back up everything before beginning the configuration.
Let’s go through the configuration in a step-by-step manner:
STEP #1: In order to enable the Network Setup option in the WordPress Dashboard, we have to define multisite configuration in the wp-config.php file.
Open wp-config.php via file manager, and add the below mentioned line right above the line where it says /* That’s all, stop editing! Happy blogging. */ :
/* Multisite */
define( ‘WP_ALLOW_MULTISITE’, true );
STEP #2: Refresh your browser window and navigate to Tools >> Network Setup from the WordPress Dashboard where you will see something like this:
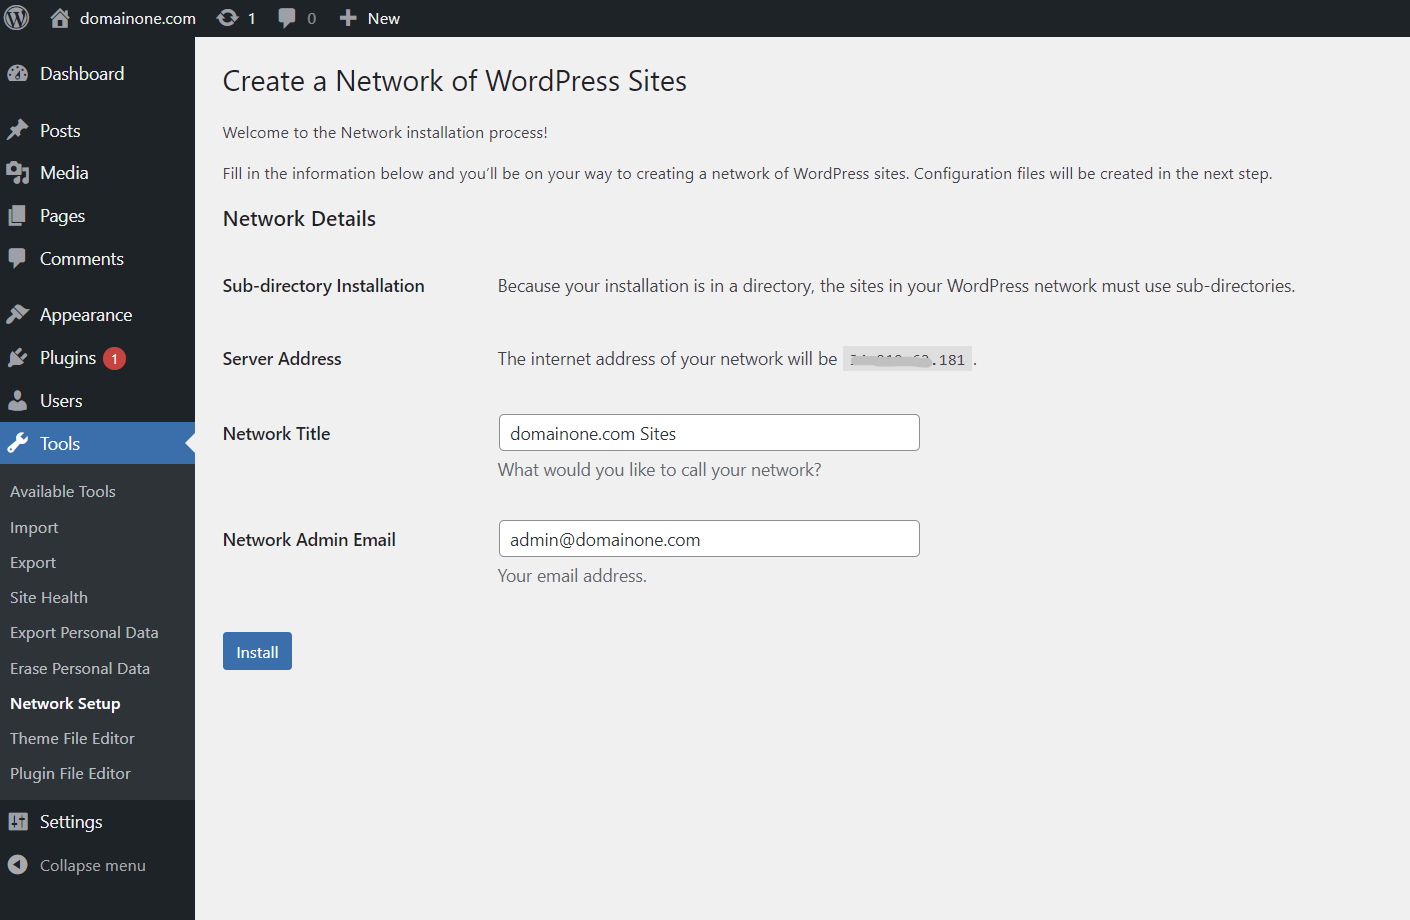
You can choose between sub-domains and sub-directories, except when existing settings restrict your choice(which is the case here as I am running the WordPress on a unregistered domain).The rest of the details are self-explanatory so just click install to proceed to the next phase.
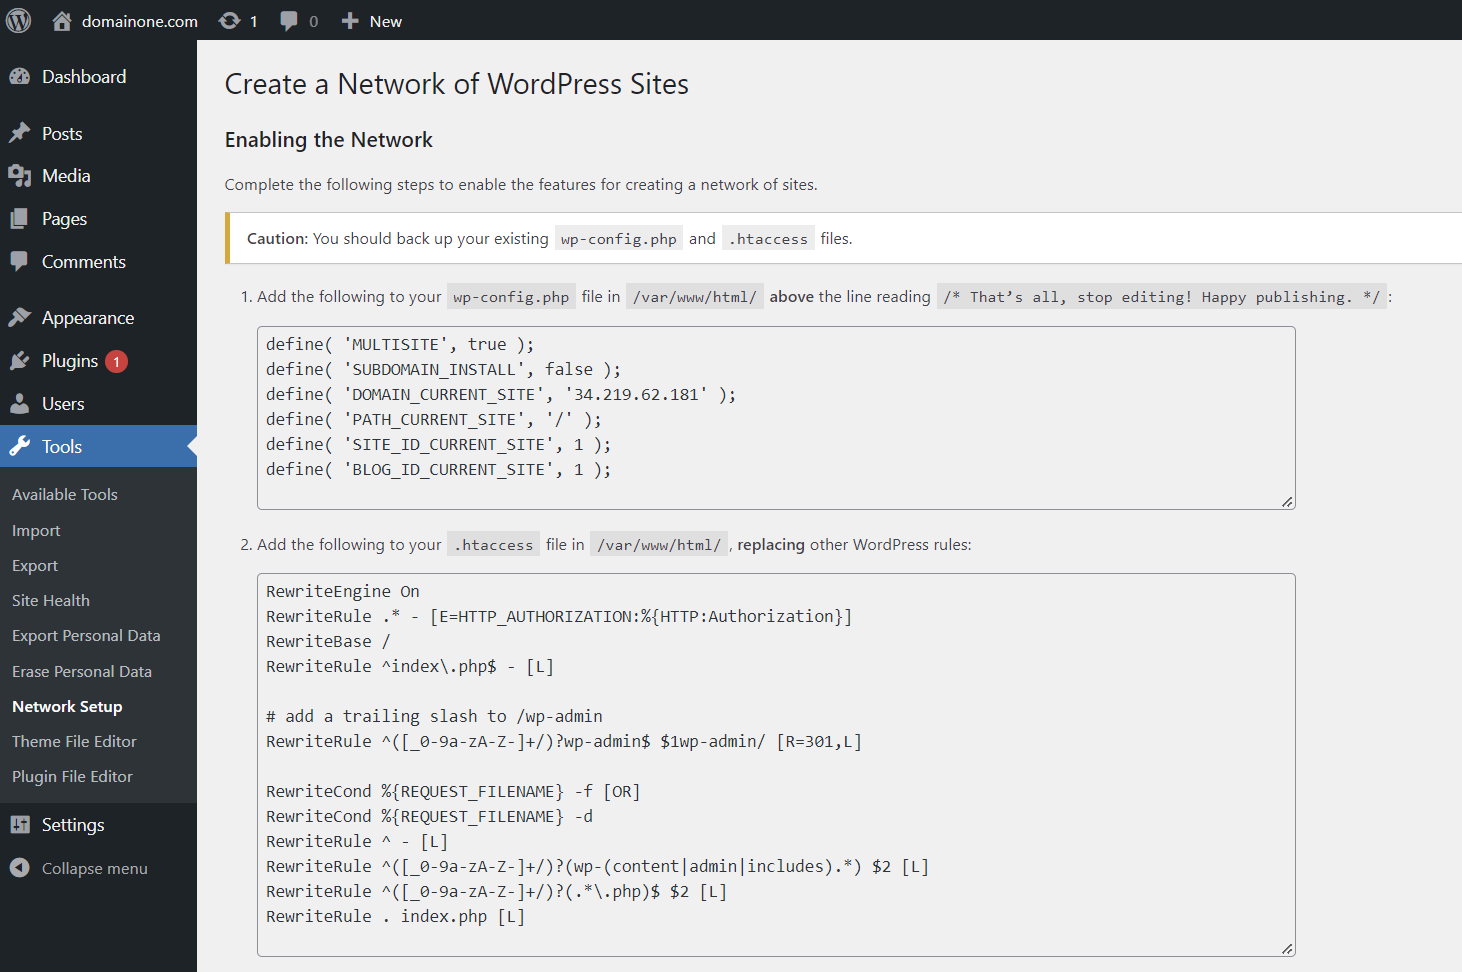
STEP #3: Next page will show you the configuration that needs to be added to the wp-config.php and .htaccess files in your hosting (please note that being a . file, htaccess might be hidden if you are checking through the file manager for some hosting providers, just enable show hidden files option and you will be able to see the file). Make sure you replace the contents in the htaccess with the mentioned code below and not add to it.
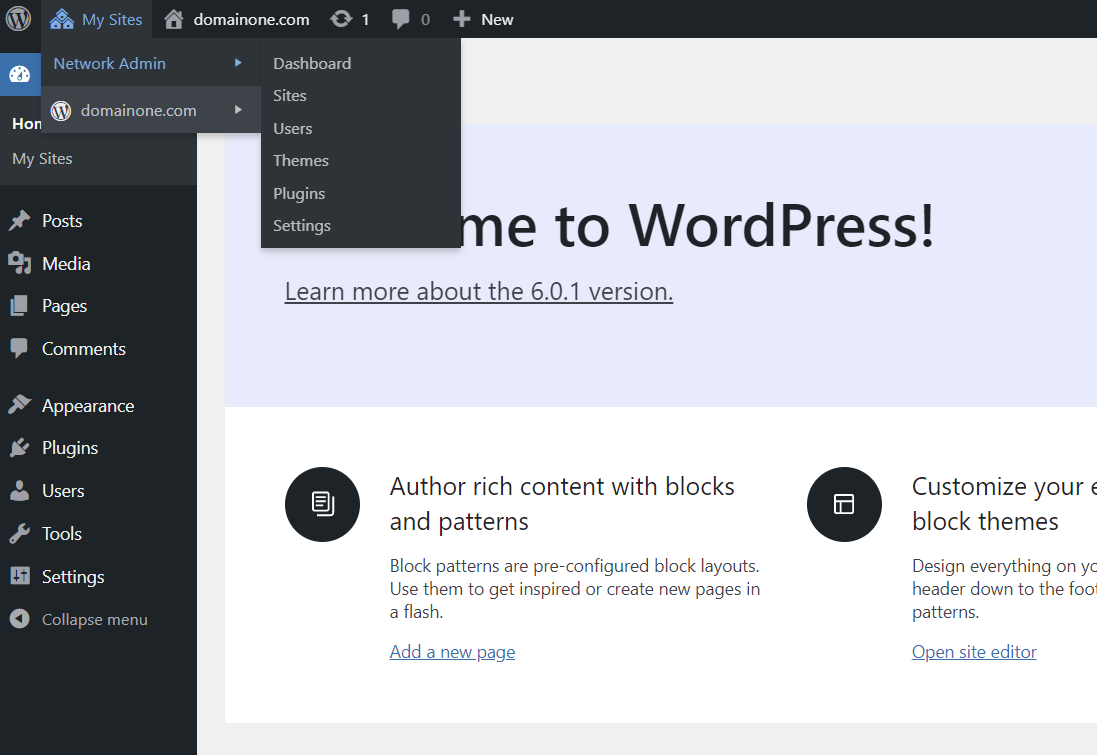
STEP #4: And there you go! You have now successfully setup WordPress multisite. To access the options, you may have to login again and this time you will have an extra option of Network Admin in your Dashboard which is like a super user through which you can access or create sites. The created sites will be available right under it and you can directly login to their Dashboard.